BBOTBRUZ
PROJECTS
All projects
Home/Projects/AI Robot from Scratch with Arduino UNO Q
AdvancedArduinoAIRobotics

AI Robot from Scratch with Arduino UNO Q

A from-scratch mobile robot connecting Arduino motion control with practical edge-AI behaviours.

RO
CREATED BYRoni Bandini

Hackster maker · Published 2026 · Original project ↗

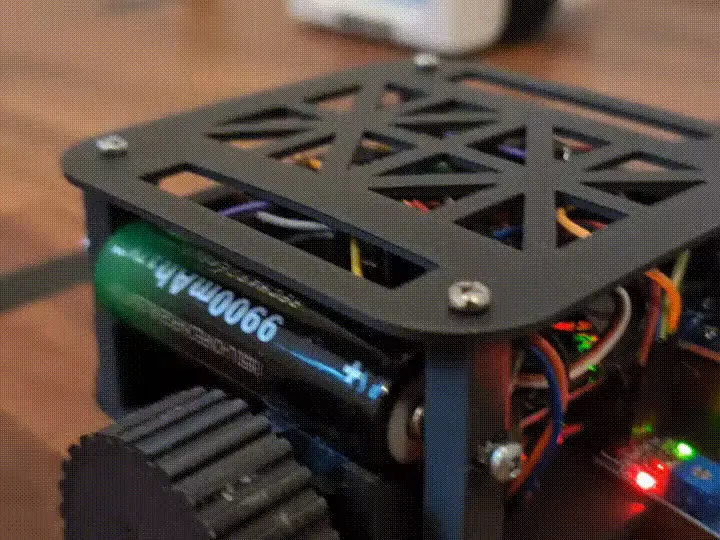
AI Robot from Scratch with Arduino UNO Q finished prototypeFINISHED BUILD · HERO SHOT
PROJECT GUIDE

BUILD TIME2–3 days

TEAMSolo maker

THE IDEA

Why we built it

THE CHALLENGE

Build an intelligent wheeled robot without a pre-assembled robotics kit, while keeping the mechanics, motor control, sensors, and AI workflow understandable.

OUR SOLUTION

Use Arduino UNO Q as the control centre, separate motor power from logic power, and divide the software into dependable movement commands plus a higher-level perception layer.

STORY

From sketch to prototype

The project starts with the chassis rather than the model. Motor placement, wheel alignment, battery position, and cable clearance are part of the intelligence because unreliable movement makes every later AI decision look wrong.

Once repeatable forward, reverse, and turning motion works, perception is added one behaviour at a time: sense the scene, choose a small action, execute it safely, then observe again.

“The best version wasn’t the one with the most features—it was the one people understood fastest.”
THINGS USED

Hardware & tools

QTYCOMPONENTROLE IN THE BUILD
1×Arduino UNO QControl and AI-capable processing
1×Two-wheel chassisMechanical base with caster
2×DC geared motorsDifferential drive
1×Dual H-bridge driverMotor current control
1×Camera or distance sensorEnvironmental input
1×Rechargeable batteryPortable power

Software

Arduino IDEArduino App LabPythonOpenCV
BUILD INSTRUCTIONS

Make it step by step

Build a balanced rolling base

Build a balanced rolling base

Mount both motors square, place the battery low and central, and keep cables away from the wheels. Confirm that the platform rolls straight before powering it.

Prove every motion command

Prove every motion command

Create small forward, reverse, left, right, and stop functions. Test at reduced speed and insert a stop before direction changes.

Add the AI behaviour loop

Add the AI behaviour loop

Convert sensor or camera output into a limited set of states, map each state to a safe movement, and stop when confidence is low.

CODE

The core logic

main.ino
enum Motion { STOP, FORWARD, LEFT, RIGHT };

void loop() {
  Perception scene = readScene();
  Motion next = scene.confidence < 0.72 ? STOP : decide(scene);
  drive(next, 135);
  delay(80);
}
View original Hackster project
REFLECTION

What we learned

  • Reliable mechanics are the foundation of convincing robot intelligence.
  • Small behaviours are easier to debug than one large autonomous loop.
  • A low-confidence AI result should stop the robot instead of forcing a guess.
WHAT’S NEXT?

Add wheel encoders and a documented test course so movement accuracy and AI decisions can be measured separately.

KEEP EXPLORING

More student builds

2007 vs 2026: A PIC IR Receiver, Built with AI project preview Watch preview
PIC · Infrared · Retro

2007 vs 2026: A PIC IR Receiver, Built with AI

A modern revisit of a classic PIC infrared receiver using AI assistance to accelerate firmware development.

View project
Raspberry Pi Pico 2 vs Pico W Complete Comparison project preview Watch preview
Raspberry Pi · Comparison · Microcontroller

Raspberry Pi Pico 2 vs Pico W Complete Comparison

A practical side-by-side guide to performance, connectivity, power, compatibility, and ideal use cases.

View project
Traffic Light System project preview Watch preview
Traffic · Automation · Arduino

Traffic Light System

A beginner-friendly intersection controller teaching sequencing, timing, and safe state transitions with LEDs.

View project
BBOTBRUZ
PROJECTS

Built for curious minds and fearless makers.

Explore all projects